Appearance
1.Chatppt MCP Server (Python)
1.1 本地模式(uv)
依赖MCP Python SDK开发,任意支持 MCP 协议的智能体助手(如Claude、Cursor等)都可以快速接入
1.1.1 搭建 Python 虚拟环境
我们推荐通过uv构建虚拟环境来运行 MCP server,关于`uv 你可以在这里找到一些说明。
按照官方流程,你会安装Python包管理工具uv。除此之外,你也可以尝试其他方法(如Anaconda)来创建你的Python虚拟环境。
通过uv添加mcp依赖
Bash
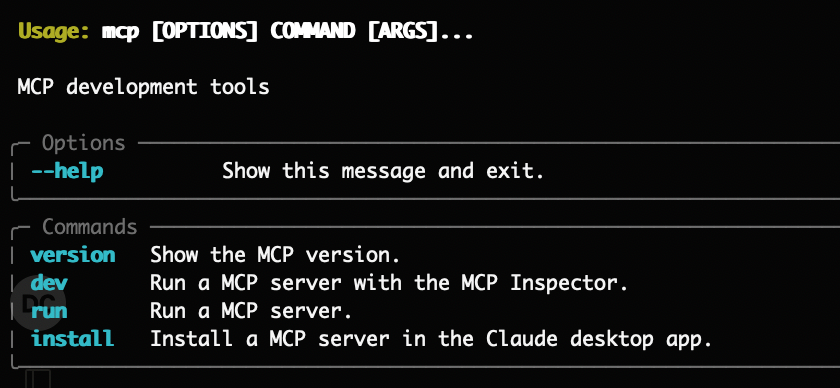
uv add "mcp[cli]"验证 mcp 依赖是否安装成功,执行如下命令
Bash
uv run mcp当出现下图时代表安装成功
通过uv安装python,最低版本要求为 3.11
Bash
uv python install 3.111.1.2 获取 MCP Server
访问 github,获取 chatppt-mcp 项目代码。
- Github 地址:https://github.com/YOOTeam/chatppt-mcp/
- 百炼地址:https://bailian.console.aliyun.com/?tab=mcp#/mcp-market/detail/ChatPPT
- mcp.so: https://mcp.so/server/chatppt-mcp/YOOTeam
- smithery.ai:https://smithery.ai/server/@YOOTeam/chatppt-mcp
1.1.3 配置本地项目
通过uv创建一个项目
Bash
uv init mcp_server_chatppt将ppt.py拷贝到该目录下,通过如下命令测试 mcp server 是否正常运行
Bash
uv run --with mcp[cli] mcp run {YOUR_PATH}/mcp_server_chatppt/ppt.py
# 如果是mac,需要加转义符
uv run --with mcp\[cli\] mcp run {YOUR_PATH}/mcp_server_chatppt/ppt.py
如果没有报错则 MCP Server 启动成功。
1.1.4 在 client 中验证使用
Cursor
打开Cursor配置,在 MCP 中添加 MCP Server

文件中添加如下内容后保存
JSON
{
  "mcpServers": {
    "chatppt": {
      "command": "uv",
      "args": [
        "run",
        "--with",
        "mcp[cli]",
        "mcp",
        "run",
        "{YOUR_PATH}/mcp_server_chatppt/ppt.py"
      ],
      "env": {
        "API_PPT_KEY": "<YOUR_API_Token>"
      }
    }
  }
}
VS code(client 插件)
在 VScode 中搜索 client 插件,并安装
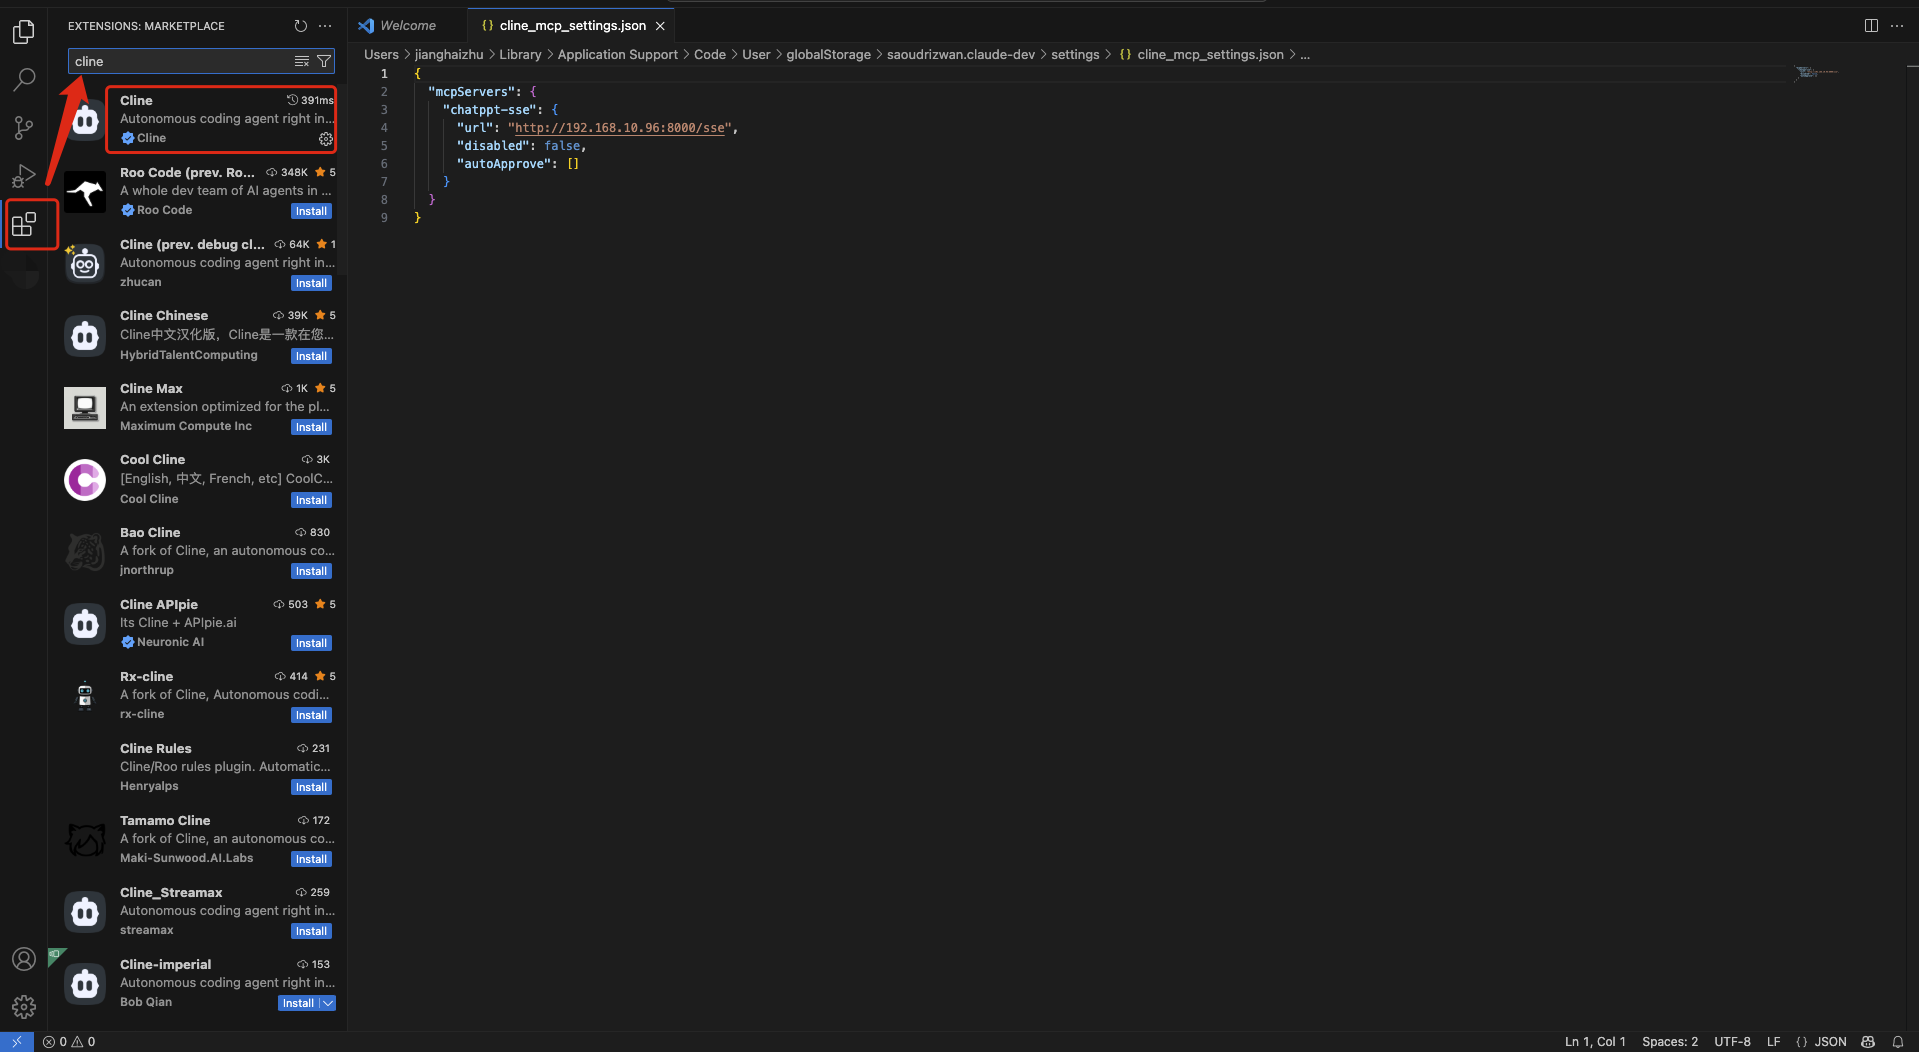
打开 client,并配置 Mcp Server

在文件中添加如下内容后保存
JSON
{
  "mcpServers": {
    "chatppt": {
      "command": "uv",
      "args": [
        "run",
        "--with",
        "mcp[cli]",
        "mcp",
        "run",
        "{YOUR_PATH}/mcp_server_chatppt/ppt.py"
      ],
      "env": {
        "API_PPT_KEY": "<YOUR_API_Token>"
      }
    }
  }
}
1.2 pip 库模式(UVX 安装远程库)
1.2.1 安装 chatppt-mcp 包
使用uvx安装chatppt-mcp包:
Bash
uvx install "git+https://github.com/YOOTeam/chatppt-mcp.git#subdirectory=python/src"1.2.2 启动 Server
Bash
uvx run chatppt1.2.3 将以下配置添加至 MCP client 中(如 Cursor)
JSON
{
  "mcpServers": {
    "chatppt": {
      "command": "uvx",
      "args": ["run", "chatppt"],
      "env": {
        "API_PPT_KEY": "<YOUR_API_KEY>"
      }
    }
  }
}